
Testcontainers is a testing library that enables you to run your tests with dependencies like databases, message queues, search engines etc., using ephemeral Docker containers. Testcontainers manage the lifecycle of the docker containers using programmable API, which gives finer control over the required application dependencies setup.
Azure Pipelines is a cloud-based continuous integration and continuous delivery (CI/CD) service provided by Microsoft as part of the Azure DevOps suite of tools. Azure Pipelines is widely used by developers and DevOps teams to streamline the software development and delivery process.
This article will explore how to run Testcontainers-based tests using Azure Pipelines on the Azure DevOps Platform.
We’re going to use an example Java/Spring Boot application, which you can find on GitHub: testcontainers-showcase.
Project Setup
In this article, we are going to create a project on GitHub and configure it to use Azure Pipelines as our Continuous Integration(CI) platform. If you already have an application you can use it or create a new project.
We are going to use the testcontainers-showcase repository which is a Spring Boot application using Testcontainers for testing.
Create azure-pipelines.yml file with the following content in the root directory of the project, commit and push the changes.
trigger:
- '*'

pool:
 vmImage: ubuntu-latest

steps:
- task: JavaToolInstaller@0
  inputs:
    versionSpec: '17'
    jdkArchitectureOption: 'x64'
    jdkSourceOption: 'PreInstalled'
  displayName: 'SetUp Java'

- script: |
   ./mvnw verify
  displayName: 'Build with Maven'
We are using JavaToolInstaller to configure the desired JDK version to use, in our case we are using Java 17. Next we configured a step to run ./mvnw verify command to run the tests using the Maven build tool.
Azure Pipeline Setup
Now go to https://dev.azure.com/ and login using your credentials. Now click on the New Project button and enter the Project name, select the Visibility and click on Create. Once the project is created, go into Project view and click on Pipelines.
Here you can configure the pipelines for your project by following the steps below:
- Click on New Pipeline button and select GitHub
- If not authenticated already, it will ask you to authenticate with your GitHub account
- Select the repository you want to configure the pipeline for.
- If there is no azure-pipelines.yml file then it will suggest a list of standard pipeline configurations based on build configuration files in your repository. As we already have azure-pipelines.yml file in our repository it will prepopulate the Pipeline editor with the contents from azure-pipelines.yml file.
- Now click on Run to trigger the pipeline.
As Azure Pipeline runners already have Docker installed and configured, the tests should run successfully.
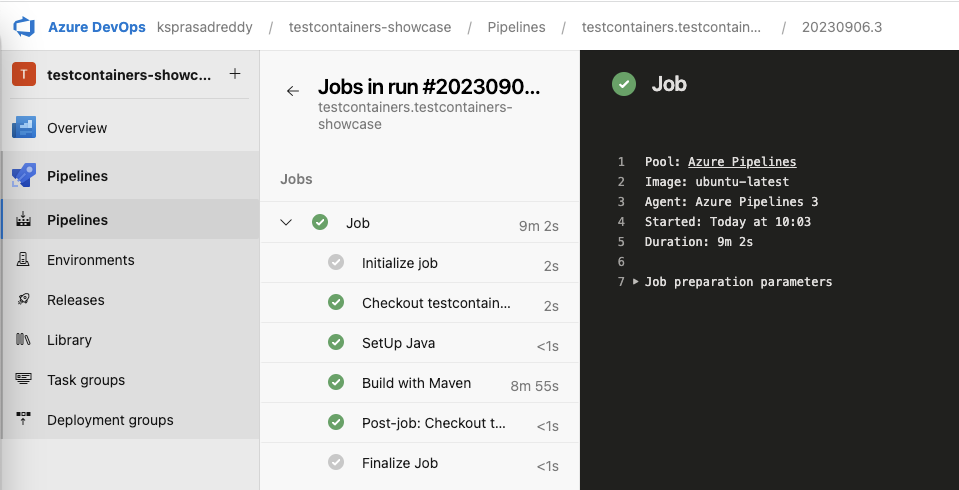
As you can see in the above image, the tests ran successfully using the default Docker support on Azure Pipeline runners. As your project grows bigger and bigger, you may use more containers for your tests and the test execution may become resource-intensive. Instead of running the test dependency containers on Azure pipeline runner itself, you can use Testcontainers Cloud where the containers will be running on a cloud environment.
By using Testcontainers Cloud, you don’t even need to have Docker daemon running on the runner, and containers will be running in the on-demand cloud environments so that you don’t need to use powerful CI workers with high CPU/Memory for your builds.
Let us see how to use Testcontainers Cloud with minimal setup and run Testcontainers-based tests.
Testcontainers Cloud based Setup
If you don’t have a Testcontainers Cloud account already, create an account as follows and get Service Account Token:
- Sign Up for a Testcontainers Cloud account at https://app.testcontainers.cloud/signup
- Once logged in, create an organization
- Navigate to the Testcontainers Cloud dashboard and generate a Service account:
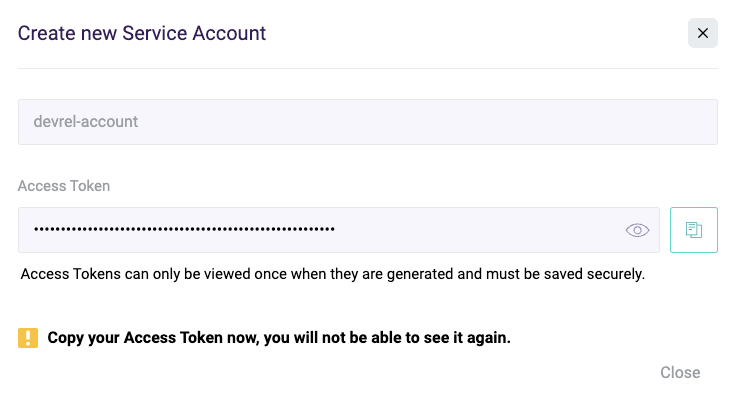
- Next, we need to set the TC_CLOUD_TOKEN as an environment variable.
- Go to the Pipeline, click on Edit and click on the Variables button.
- Click on New variable and fill in the details:
- Name: TC_CLOUD_TOKEN
- Value: Enter the Service Account Access Token
- Select Keep this value secret checkbox
- Click on OK and Save
Next, update the azure-pipelines.yml file as follows:
trigger:
- '*'

pool:
    vmImage: ubuntu-latest

steps:
- task: Bash@3
  inputs:
    targetType: "inline"
    script: 'sh -c "$(curl -fsSL https://get.testcontainers.cloud/bash)"'
  env:
    TC_CLOUD_TOKEN: $(TC_CLOUD_TOKEN)
  displayName: 'SetUp TC Cloud Agent'

- task: JavaToolInstaller@0
  inputs:
    versionSpec: '17'
    jdkArchitectureOption: 'x64'
    jdkSourceOption: 'PreInstalled'
  displayName: 'SetUp Java'

- script: |
    ./mvnw verify
  displayName: 'Build with Maven'
We have included a step before executing our tests to start the Testcontainers Cloud agent by passing the TC_CLOUD_TOKEN as an environment variable looking up the value from the variable we defined earlier in Pipeline.
Now if you commit the updated azure-pipelines.yml file then the pipeline will run the tests using Testcontainers Cloud. You should see the following logs statements indicating that the Testcontainers-based tests are using Testcontainers Cloud instead of the default Docker daemon.
05:19:28.539 [main] INFO org.testcontainers.DockerClientFactory - Connected to docker:
Server Version: 78+testcontainerscloud (via Testcontainers Desktop 1.4.15)
API Version: 1.43
Operating System: Ubuntu 22.04.3 LTS
Total Memory: 15689 MB
05:19:29.727 [main] INFO org.testcontainers.utility.RyukResourceReaper - Ryuk started - will monitor and terminate Testcontainers containers on JVM exit
We can also leverage Testcontainers Cloud’s TurboMode in conjunction with build tools that feature parallel run capabilities to run our tests parallelly.
In the case of Maven, we can use the “-DforkCount=N” system property to specify the degree of parallelisation. For Gradle, we can specify the degree of parallelisation using the “maxParallelForks” property.
We can enable parallel execution of our tests using 4 forks in azure-pipelines.yml as follows:
- script: |
    ./mvnw verify -DforkCount=4
  displayName: 'Build with Maven'
For more information on using TurboMode, please refer https://knowledge.testcontainers.cloud/turbo-mode.
Conclusion
In this article, we have explored how to run Testcontainers-based tests on Azure Pipelines using the default Docker daemon. Then we learned how to create a Testcontainers Cloud account and configure the pipeline to run tests using Testcontainers Cloud. We also explored leveraging Testcontainers Cloud TurboMode combined with your build tool’s parallel execution capabilities.
Though we have demonstrated this setup using a Java project as an example, Testcontainers libraries exist for other popular languages too, and you can follow the same pattern of configuration to run your Testcontainers-based tests on Azure Pipelines in Golang, .NET, Python, NodeJS, etc.
You can get started with Testcontainers Cloud by creating a free account at https://testcontainers.com/cloud/.
